
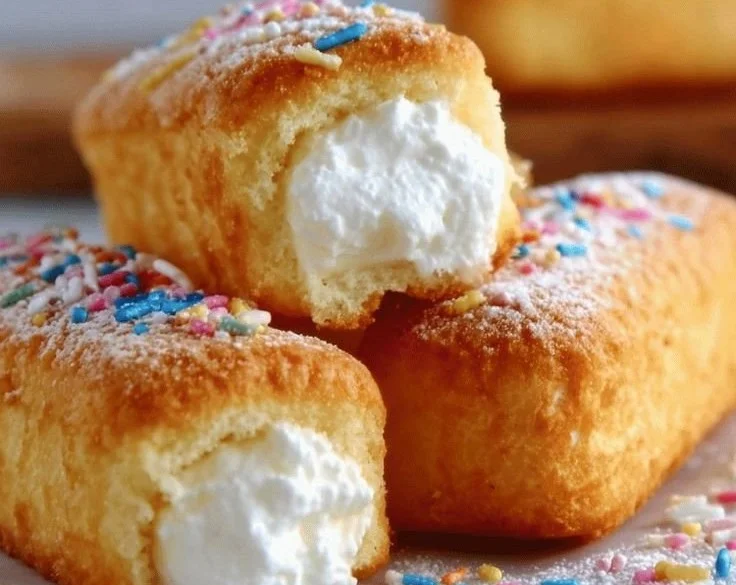
Twinkies, those delightful cream-filled sponge cakes, have a special place in the world of snacks. They stir fond memories of childhood indulgence, and many people seek to recreate that experience in their own kitchens. This homemade version not only offers a healthier alternative but also allows you to customize flavors and fillings to suit your taste. The satisfaction of biting into a soft, fluffy cake filled with whipped cream is simply irresistible. Whether it’s for a lunchbox treat for the kids or a nostalgic dessert for adults, these homemade Twinkies will bring smiles to everyone’s faces.
Why You’ll Love This Dish
There are plenty of reasons to try making your very own Back-to-School Homemade Twinkies.
First off, you can ditch the preservatives often found in store-bought versions, making these treats a bit healthier. Plus, they pack a punch of nostalgia that brings joy to both kids and adults alike. They’re simple to whip up and can easily become a fun family activity.
Perfect for a quick after-school snack, a birthday party, or just to satisfy your sweet tooth on a quiet weekend afternoon, these Twinkies are versatile. Imagine biting into that fluffy exterior, the creamy filling bursting with a light sweetness. They truly are a classic dessert with a homemade twist.
“I made these for my kids’ lunchboxes, and they went wild! They taste even better than the store-bought ones. My friends are now requesting these for their gatherings too!” – Emily J.
Cooking Process Explained
Making your own Back-to-School Homemade Twinkies involves a simple yet rewarding cooking process. Here’s a brief overview of how the recipe flows:
- Preheat your oven and prepare your baking dish.
- Cream the butter and sugar together to create a fluffy base.
- Incorporate eggs, milk, and vanilla for added flavor and moisture.
- Mix dry ingredients separately and fold them into the batter.
- Bake until golden and fluffy, then cool completely.
- Whip the filling and pipe it into the cooled cakes.
This straightforward sequence not only makes the process manageable but also results in scrumptious treats that feel like they came straight from a bakery.
Gather These Items
Here’s what you’ll need for your Back-to-School Homemade Twinkies:
- 1 cup all-purpose flour
- 1/2 cup granulated sugar
- 1/4 cup unsalted butter, softened
- 2 large eggs
- 1/2 cup milk
- 1 teaspoon vanilla extract
- 1 teaspoon baking powder
- 1/4 teaspoon salt
- 1 cup heavy cream
- 1/2 cup powdered sugar
Substitution Tips
If you’re short on all-purpose flour, you can use cake flour for a lighter result. Unsalted butter can be swapped with margarine if needed, and for a dairy-free version, coconut cream can make a delightful filling alternative. Don’t hesitate to experiment with flavorings in the cream, such as almond extract for a unique twist.
Step-by-Step Instructions
Now, let’s dive into the specifics of making these delicious homemade Twinkies.
-
Preheat the Oven: Set your oven to 350°F (175°C) and lightly grease a Twinkie pan or a standard muffin tin. This step is crucial for ensuring your cakes don’t stick.
-
Cream the Butter and Sugar: In a large mixing bowl, beat together the softened butter and granulated sugar until you achieve a light and airy mixture. This usually takes about 3–5 minutes.
-
Incorporate Eggs and Milk: Add the eggs one at a time, mixing well after each addition. Then, stir in the milk and vanilla extract to keep the batter moist.
-
Combine Dry Ingredients: In a separate bowl, whisk together the flour, baking powder, and salt. Gradually add this mixture to the wet ingredients. Mix gently until just combined; be careful not to overmix.
-
Fill the Pan: Pour the batter into your prepared pan, filling each cavity about 2/3 full to allow room for rising.
-
Bake to Perfection: Bake for 15-20 minutes, or until a toothpick inserted in the center of a cake comes out clean. Your kitchen will soon be filled with a wonderful aroma!
-
Cool Completely: Let the cakes cool in the pan for a few minutes before transferring them to a cooling rack. Allow them to cool entirely before filling.
-
Prepare the Cream Filling: In a mixing bowl, whip the heavy cream and powdered sugar until stiff peaks form. This whipped cream will be the indulgent filling.
-
Cut and Fill: Carefully slice a slit in the side of each cooled cake. Use a piping bag or spoon to generously fill each Twinkie with whipped cream.
-
Serve and Enjoy: Your homemade Twinkies are ready to be devoured!
Best Ways to Enjoy It
These homemade Twinkies shine on their own but can also be served in creative ways. Consider pairing them with a scoop of vanilla ice cream or drizzling a warm chocolate sauce on top for an extra treat.
For a more festive presentation, plate them alongside fresh berries or a sprinkle of powdered sugar. You could even serve them with a glass of cold milk or a strong cup of coffee—perfect for dunking!
Keeping Leftovers Fresh
If you have any leftover Twinkies (though we doubt that will happen!), store them in an airtight container in the refrigerator. They’ll stay fresh for about 3-5 days. To enjoy them again, you could briefly microwave them to restore their softness, or serve them chilled for a refreshing snack.
Freezing Tips
For longer storage, you can freeze your homemade Twinkies. Just wrap each one in plastic wrap and place them in a zip-top freezer bag. They’ll keep well for 1–2 months. When you’re ready to eat, simply thaw them in the refrigerator and enjoy!
Helpful Cooking Tips
To ensure your homemade Twinkies turn out perfectly every time, keep these tips in mind:
- Measure Accurately: Baking is a science; make sure to measure your ingredients accurately for consistent results.
- Ingredient Temperature: Use room temperature butter, eggs, and milk for better mixing and fluffiness.
- Don’t Overmix: Once you combine the dry and wet ingredients, mix until just blended to maintain a light texture.
Creative Twists
Feel free to play around with flavors and fillings! For a chocolate twist, add cocoa powder to the batter and fill it with chocolate ganache. If you want to brighten things up, lemon zest and juice can add a refreshing citrus flavor to both the cake and the filling.
Dietary Adjustments
For gluten-free options, you can substitute all-purpose flour with a 1:1 gluten-free baking flour. Additionally, explore dairy-free whipped creams for those sensitive to lactose.
Your Questions Answered
Q: How long does it take to prepare these homemade Twinkies?
A: The preparation and baking time is about 35-45 minutes, plus cooling time.
Q: Can I substitute sugar with a sugar alternative?
A: Yes, you can use sugar substitutes like stevia or erythritol. Just make sure to follow the conversion ratios indicated on the packaging.
Q: Can I freeze these Twinkies?
A: Absolutely! Just wrap them well to prevent freezer burn and thaw them when you’re ready to enjoy.
Creating Back-to-School Homemade Twinkies not only brings a touch of nostalgia but also allows for endless creativity. You’re not just baking; you’re crafting delicious memories!
Print
Back-to-School Homemade Twinkies
- Total Time: 45 minutes
- Yield: 12 servings 1x
- Diet: Vegetarian
Description
Delicious homemade Twinkies filled with whipped cream, a nostalgic treat that’s healthier than store-bought versions.
Ingredients
- 1 cup all-purpose flour
- 1/2 cup granulated sugar
- 1/4 cup unsalted butter, softened
- 2 large eggs
- 1/2 cup milk
- 1 teaspoon vanilla extract
- 1 teaspoon baking powder
- 1/4 teaspoon salt
- 1 cup heavy cream
- 1/2 cup powdered sugar
Instructions
- Preheat the Oven: Set your oven to 350°F (175°C) and lightly grease a Twinkie pan or a standard muffin tin.
- Cream the Butter and Sugar: In a large mixing bowl, beat together the softened butter and granulated sugar until light and airy.
- Incorporate Eggs and Milk: Add the eggs one at a time, mixing well after each addition, then stir in the milk and vanilla extract.
- Combine Dry Ingredients: Whisk together the flour, baking powder, and salt, then gradually add to the wet ingredients, mixing gently.
- Fill the Pan: Pour the batter into your prepared pan, filling each cavity about 2/3 full.
- Bake to Perfection: Bake for 15-20 minutes until a toothpick comes out clean.
- Cool Completely: Let the cakes cool in the pan before transferring them to a cooling rack.
- Prepare the Cream Filling: Whip the heavy cream and powdered sugar until stiff peaks form.
- Cut and Fill: Slice a slit in each cooled cake and fill with whipped cream.
- Serve and Enjoy: Enjoy your homemade Twinkies!
Notes
Measure accurately for best results and customize flavors with different extracts.
- Prep Time: 15 minutes
- Cook Time: 20 minutes
- Category: Dessert
- Method: Baking
- Cuisine: American
Nutrition
- Serving Size: 1 Twinkie
- Calories: 220
- Sugar: 10g
- Sodium: 150mg
- Fat: 8g
- Saturated Fat: 4g
- Unsaturated Fat: 3g
- Trans Fat: 0g
- Carbohydrates: 30g
- Fiber: 0g
- Protein: 3g
- Cholesterol: 50mg
Keywords: Twinkies, homemade desserts, childhood snacks, baking recipes