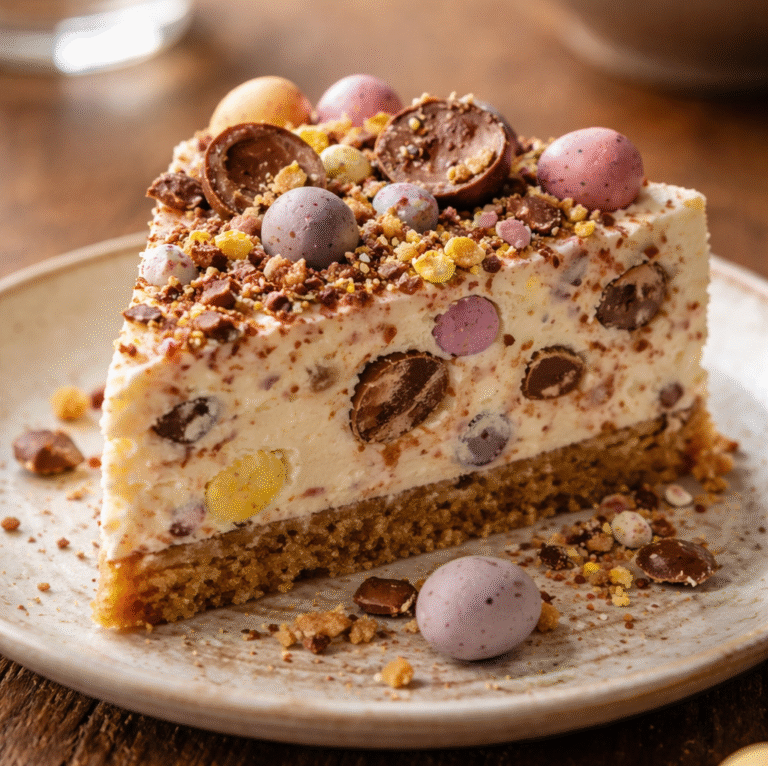
There’s something irresistibly nostalgic about pastel chocolate mini eggs tucked into a creamy cheesecake. This dessert captures that festive Easter joy in every bite—crunchy, silky, sweet, and just a little indulgent.
Whether you’re hosting brunch, bringing dessert to a spring gathering, or simply craving a cheerful treat, this Mini Egg Cheesecake is surprisingly easy to make and guaranteed to impress without stress.
Why This Recipe Works Every Time
- Flavor: Creamy vanilla cheesecake balanced with crunchy chocolate mini eggs
- Texture: Smooth filling + crisp biscuit base + candy crunch
- Time: Simple prep with mostly hands-off chilling
- Budget: Affordable ingredients with big impact
- Beginner-friendly: No fancy techniques required
- Meal prep: Perfect make-ahead dessert for gatherings
What You’ll Need
Core Ingredients
- 250g digestive biscuits (or graham crackers)
- 120g unsalted butter, melted
- 500g cream cheese, softened
- 120g powdered sugar
- 1 tsp vanilla extract
- 300ml heavy cream
- 200g chocolate mini eggs, crushed
Flavor Boosters
- 1 tbsp lemon juice (brightens flavor)
- Pinch of salt (balances sweetness)
- 50g melted milk chocolate (optional swirl)
Smart Swaps & Add-Ins
- Use Oreo cookies instead of digestives for a chocolate base
- Swap mini eggs with chopped chocolate bars
- Add a caramel drizzle layer
- Use mascarpone for extra richness
Step-by-Step: From Prep to Plate
- Crush biscuits into fine crumbs using a food processor or rolling pin
- Mix crumbs with melted butter until evenly coated
- Press mixture firmly into a springform pan to form the base
- Chill in the fridge for 20–30 minutes
- Beat cream cheese until smooth and lump-free
- Add powdered sugar, vanilla, lemon juice, and salt; mix well
- Whip heavy cream to soft peaks in a separate bowl
- Fold whipped cream gently into cream cheese mixture
- Stir in crushed mini eggs
- Pour filling over chilled base and smooth the top
- Chill for at least 6 hours or overnight
- Decorate with extra mini eggs before serving
Quick Visual Cues
- Base should feel firm and compact
- Filling should be silky, not runny
- Cheesecake is ready when fully set and sliceable
Pro Tips From a “Made-This-Too-Many-Times” Cook
- Don’t overmix once cream is added—keep it airy
- Use room temperature cream cheese to avoid lumps
- Chill overnight for best texture
- Crush mini eggs unevenly for better texture contrast
- Line your pan for easy removal
Serving Ideas That Make It Feel New
- Serve with whipped cream and chocolate drizzle
- Add fresh strawberries or raspberries
- Cut into mini bars for party platters
- Pair with coffee or hot chocolate
- Top with Easter-themed sprinkles
Variations You’ll Actually Want to Try
- Healthier: Use low-fat cream cheese and reduced sugar
- High-protein: Add Greek yogurt or protein cream cheese
- Vegan: Use dairy-free cream cheese and coconut cream
- Spicy: Add a pinch of chili powder to chocolate layer
- Kid-friendly: Add colorful sprinkles and marshmallows
Storage, Reheating, and Make-Ahead Game Plan
- Store covered in the fridge for up to 4 days
- Freeze slices individually for up to 1 month
- Thaw overnight in fridge before serving
- Make 1–2 days ahead for best flavor
Troubleshooting: Common Mistakes and Easy Fixes
- Too soft: Needs more chilling time
- Lumpy filling: Cream cheese wasn’t soft enough
- Crumbly base: Add more butter
- Too sweet: Add lemon juice or salt
- Hard to slice: Use a warm knife
Ingredient Deep Dive
Cream Cheese
The backbone of the cheesecake—rich, tangy, and creamy. Always use full-fat for best results.
Mini Eggs
These add crunch and bursts of chocolate flavor. Crushing them creates texture variation.
Heavy Cream
Whipped into the filling for a light, mousse-like texture that sets beautifully.
FAQs
Can I bake this cheesecake?
This version is no-bake, but you can adapt it into a baked cheesecake if preferred.
Can I use other candies?
Yes, any chocolate candy works well.
How long does it need to set?
At least 6 hours, but overnight is best.
Can I make it gluten-free?
Use gluten-free biscuits for the base.
Final Thoughts
This Mini Egg Cheesecake is everything an Easter dessert should be—fun, colorful, creamy, and just a little indulgent. It’s simple enough for beginners but impressive enough for celebrations, making it a go-to recipe you’ll revisit every spring.
PrintMini Egg Cheesecake (Easy Easter Dessert Recipe)
- Total Time: 6 hours 20 minutes
- Yield: 10 slices 1x
- Diet: Vegetarian
Description
This Mini Egg Cheesecake (Easy Easter Dessert Recipe) is a creamy, no-bake treat packed with crunchy chocolate mini eggs and a buttery biscuit base. Perfect for spring gatherings, this festive cheesecake is simple, colorful, and irresistibly delicious.
Ingredients
- 250g digestive biscuits
- 120g unsalted butter melted
- 500g cream cheese softened
- 120g powdered sugar
- 1 tsp vanilla extract
- 300ml heavy cream
- 200g chocolate mini eggs crushed
- 1 tbsp lemon juice
- pinch salt
- 50g milk chocolate melted
Instructions
- 1. Crush biscuits into fine crumbs
- 2. Mix crumbs with melted butter
- 3. Press mixture into a springform pan
- 4. Chill base for 30 minutes
- 5. Beat cream cheese until smooth
- 6. Add sugar vanilla lemon juice and salt
- 7. Whip heavy cream to soft peaks
- 8. Fold whipped cream into mixture
- 9. Stir in crushed mini eggs
- 10. Spread filling over base
- 11. Chill for at least 6 hours
- 12. Decorate with extra mini eggs and serve
Notes
- Use full-fat cream cheese for best texture
- Chill overnight for clean slices
- Do not overmix after adding cream
- Line pan for easy removal
- Crush mini eggs unevenly for texture
- Add chocolate drizzle for extra flavor
- Keep refrigerated until serving
- Use warm knife for slicing
- Prep Time: 20 minutes
- Cook Time: 0 minutes
- Category: Dessert
- Method: No-Bake
- Cuisine: American
Nutrition
- Serving Size: 1 slice
- Calories: 420
- Sugar: 28g
- Sodium: 220mg
- Fat: 30g
- Saturated Fat: 18g
- Unsaturated Fat: 10g
- Trans Fat: 0g
- Carbohydrates: 32g
- Fiber: 1g
- Protein: 5g
- Cholesterol: 85mg
Keywords: mini egg cheesecake,easter dessert,no bake cheesecake